A Beginners Guide on Growing A Vegetable Garden

lettuce-seedling

Are you interested in gardening or thinking of starting a small one in your backyard but have no clue where to start? We’ve put together this guide to help novice gardeners know how to plan and grow tasty, organic vegetables.

Vegetable Gardening for Beginners

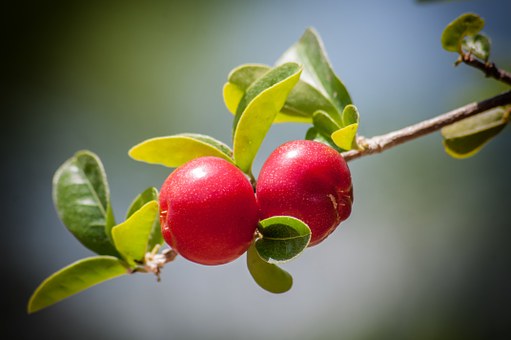
Before you discover how to grow tasty vegetables, you need to be sure about why you want to garden. If you have eaten veggies freshly sourced from the garden, you definitely noted the distinct sweet and juicy flavors. You also may have noticed the vibrant color and texture that the vegetables have; which other foods can be that!

Now, then of the joy of having a ready supply of fresh veggies growing in your yard. That is why people love gardening.

In this guide, we wish to highlight how you can identify the right site for the garden, to create the appropriate size, and how to select the vegetables to cultivate that small piece of land.

1.    Picking the Right Location

Identifying the ideal spot for setting up your vegetable garden is vital. Picking the wrong location can result in sub-par vegetables. Below are a few tips to help you figure out the best site for your veggie garden.

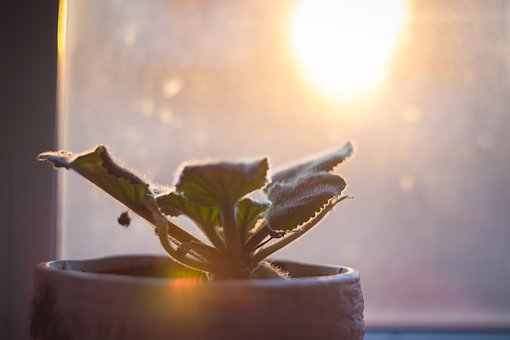
•    The area you pick should have plenty of sunlight since vegetables require at least six hours of direct sunlight daily. The sun is the source of all the goodness that you will enjoy is your vegetables; their size, color, texture, and taste.

•    The site should have good soil that is soft for the roots to penetrate. It also should be fertile soil, which you can enhance using compost manure.

•    Ensure there is proper drainage so that water does not collect or drain away too fast.

•    The surrounding environment should be stable to facilitate the growth of healthy plants. It should not be a location prone to floods, strong winds, or dries out a lot. Most importantly, it should be in an area where there are plenty of natural pollinators.

2.    Choosing A Plot Size – Start Small

Why go for a big garden that will frustrate you while you can start with a small one that will be your pride and joy whenever you step into your yard? Do not be quick to take a bite-size you cannot swallow. Take the time to plan your garden. The smart approach is to start small as you learn the ropes and get the hang of things. Create a plot that is 16×10 feet and opt to plant crops that grow with ease. You also may consider the harvest size you want based on your family’s food needs for a season.

When prepping the site, around 11 rows along the width and have each 10 feet long. Check the direction of the sun so that the rows run north and south maximizing the direct sunlight. You can make the rows shorter if the garden is too large to suit your needs. As for what to plant, consider planting crops that yield more than one harvest per season. The options for this include spinach, kales, carrots, kohlrabi, turnips, beets, rutabagas, and capsicum.

vegetable garden

3.    Growing the Best Vegetables

Once you have picked the right spot and know which vegetables you want to grow, your focus should then shift to figuring out how to facilitate their growth as best as possible. Below are a few tips that can be helpful.

•    Space your crops properly:    If the plants are set very close to each other, they will compete for water, nutrition, and sunlight. The result of this is a strained maturity. Ensure that you adequately space them so that they do not overshadow or compete with each other. You can read the spacing guidance on the seed packets to figure out the distance to have between each plant.

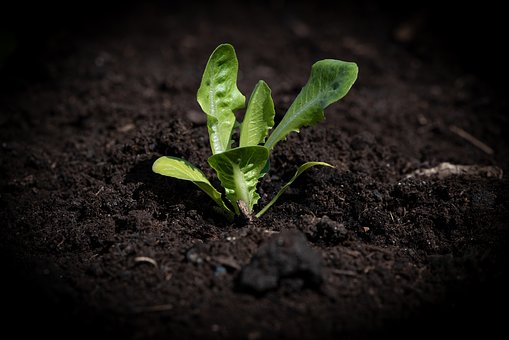
•    Use high-quality seeds:    Your heart will be broken if the seedlings died soon after breaking from the ground. Buying individual seedlings is far costly than purchasing seed packets. However, your time, money, and efforts will be a waste if you sow seeds that will not germinate. Know when to sow so that you can get high yields during the set harvest time.

•    Plant and harvest the right time:    As mentioned, do not sow too late or too early. Understand the timings for planning every vegetable. Check the details on the seed packet to know the planting dates.

•    Irrigate your garden:    When watering your vegetables, do not do it too much or too little. Balance it and you will give them the best chance to grow and have healthy produce.

Hydrangea Arborescens “Annabelle” Plants

hydrangea annabelle blooms

Facts about the Arborescens Annabelle Hydrangea Plant

  • 3 to 9 USDA Hardiness Zone rated.
  • Grows to 3 to 5 feet in height.
  • Spans 4’ to 6’.
  • Should be placed under a partial shade where it still gets direct exposure to the sun.
  • Produces white flowers.
  • The period between June and September marks its bloom time.
  • Hydrangea Arborescens “Annabelle” is its scientific name.

Annabelle

The most popular variety of the Smooth Hydrangea arborescens family is the Annabelle. It was the most popularly known Hydrangea arborescens by the pubic and was the only one that was easily found in garden centers, until recently.

The plant which grows to a height of 3 to 5 feet with a relatively wider spread is considered to be a mounding shrub. Its large white blooms, usually 8 to 12 inches in diameter, which can be used in dried or fresh floral arrangements are produced between the months of July and September.

It is considered to be a great option for an assorted border since it flowers in summer and is small in size. Even though the plant grows well in the full sun where sufficient moisture is available, Annabelle is mainly suited to growing in partial shade, on well-drained and uniformly wet soil. Most gardeners prune the stems to the ground in winter because the plant mostly flowers on the “new wood” (new season’s growth). In the same summer, new shoots grow and bloom from the remaining base. Gardening enthusiasts in the Southwest arid areas should avoid this plant.

Among the top one hundred vine and shrub species cultivated for their expansive and flashy flower heads, Hydrangea is a treasured genus. One of the main reasons for having Hydrangeas is that they give their best during the summer and fall seasons, when most woody shrubs are dormant.

flowering hydrangea

The plant’s flowers usually exceed 10 inches in diameter and are stunningly white.

This variant usually blooms following intense winters or severe pruning unlike other variants such as the pink and blue Hydrangeas. Without fail, the white blooms, resembling drumsticks, appear in abundance. Since the shrub can be severely pruned to tidy things up during winter, many gardeners choose to plant it as a hedge.

In both warm and colder geographic areas, this shrub makes for an exceptional display. Although it is officially classified under Zone 3, there has been word of it doing well in US Zone 2 as well. You will find, native to some eastern regions of the US, some forms of Hydrangea arborescens. Annabelle is definitely a great alternative to consider if your climate happens to be too harsh on macrophyllas.

Looking After Arborescens Annabelle Hydrangea

You need to shelter the plants from the afternoon sun with shade even though they do well with direct exposure to the morning sun, or spotted shade all day – especially when grown in the south, just as is the case with most other hydrangeas. The shrub does well will all-day exposure to the sun in northern regions of the US. Though I have not fund it to be true, the Annabelle is said to do better in heavy shade than other Hydrangeas in some literature. For me, it seems to bloom better with more sun exposure. In both the colder north and the warmer Deep South (US Zones 8 to 3), Arborescens will do well.

hydrangea multi colour arrangement

How To Support The Droopy Bloom Heads Of The Annabelle

This is considered to be one of the biggest challenges of growing this attractive hydrangea. After it rains, the expansive Annabelle booms tend to bend downwards. The entire plant maybe flattened as a result, in severe cases.

To prevent or reduce the effect of this challenge, follow the tips listed below:

  1. Use an ornamental fence to support the Annabelle: When it comes to supporting the heavy Annabelle flowers, this is one of the most creative ideas we have come across.
  2. Grow a group of Annabelle plants next to each other: Planting around 3 Annabelle plants together ensures that they can support each other as they mature. The plants should be about three to four feet away from each other.
  3. Do not cut down the plants severely: Instead of pruning your plants to the ground each year, it might be better for you to cut it down to about 18 to 24 inches in height to keep it from flattening in the rain. The stems will bulk up, year after year, making it easier for them to support the rest of the plant. The number of blooms will continue to be high while their size will diminish, but not to disappointing proportions. Smaller booms are not going to droop as easily of course. This tip may not work for shrubs grown in northern regions. This is simply because the stems are unlikely to survive the winter.
  4. Encircle each plant with a short wire fence: The flowers will be held in place, away from the ground, if young shrubs are encircled by a wire fence before new shoots emerge in spring. You can find 18 inch green wire fencing designed for use in lining flower beds in local gardening supplies stores. Design something resembling a short tomato cage by cutting the wire into bits that can go round the base of the plant. The wire will be hidden completely as the plant start producing leaves.

Pruning Your Annabelle Hydrangea

Every year, this Hydrangea grows blooms on new shoots. These plants can handle aggressive pruning since they are aggressive bloomers. If you would like your plant to have strong branches, you should only cut it down to 18 to 24 inches in height, as mentioned above. These shrubs will grow back each year and produce a huge amount of attractive flowers, without any issues, even if you decide to cut them down completely. However, you should never prune the plants when they are getting ready to bloom, during spring.

Spacing Your Arborescens Hydrangea

hydrangeas hedge

Plant the shrubs about three to four feet away from each other if they are part of a hedge, or you want them to support each other. If this is not the case, then plant them about five or six feet away from each other.

Taking Care of Water Lilies

water lily plant

A Lovely Way to Add an Attractive Touch

Water lilies are a lovely way to add an attractive touch to your water garden or pond. They easily give shelter and shade to any fish in your pond, while reducing algae, acting as a natural water filter, and oxygenating the existing water in the pond.

Tropical Water Lilies

Tropical water lilies can either bloom in the day time, opening in mid morning and closing up in late afternoon, or they can be a night blooming variety, opening at dusk and then staying open throughout the night. Tropical lilies are well suited for warm zones, hardiness of Zone 5 and higher; Calgary is a Zone 3 and is only suited for hardier varieties of water lilies that are non-tropical.

Nymphaea Alba

These hardier water lilies are extremely popular in ponds, and they usually can be purchased in peach, pink, yellow, red, and white. If you choose them for your pond, place them at a depth one to two feet beneath the surface of the water. Once the leaves have reached the surface, put organic plant fertilizer pellets into the pots and you’ll be able to enjoy bigger blooms and more leaves. Your water lilies will need at least six full hours of sun per day. The flowers typically bloom in the morning, closing sometime in mid afternoon. Hardy water lilies only bloom during the day, unlike their tropical counterparts.

two pink water lilies

The best pond plants are often found at your local garden center, as they’ll be acclimated to your local temperatures. You may be able to find high quality lilies at the garden center, or at a pet store that offers pond accessories or aquarium plants.

How to Overwinter Your Water Lilies

Water lilies are perennials, and they’ll be content in a pond as long as the water is deep enough that their roots won’t freeze solid. If your pond typically freezes solid in the winter, remove the lilies from the pond when temperatures drop in the fall. There are multiple methods for overwintering your lilies, one of the easiest methods is for me to wrap the lily, along with the container, in a black bag and keep it stored at a cool temperature where it can stay damp and comfortable through the winter.

An alternate method is to remove the plant from the pot and wrap the tuber in leaves or moist peat, then store the entire thing in a cool dark environment until the weather warms up in the spring. Lilies will go dormant when put in dark cold storage, and then when you return them to their normal pond environment in the spring, they’ll return to their normal happy selves.

How to Care for Lilacs

Lilac branches

The Fragrant and Beautiful Lilac …

May’s long weekend is usually right around the corner, when lilacs start blooming in Southern Alberta. This also signals the best time for you to start preparing your patio plants, shrubs and garden. Here are a few useful pointers to help you decide whether lilacs are for you if you have considered including them in your garden but are not sure about their soil, planting and pruning requirements.  

Lilac Growing Basics

Even though you can find some varieties that grow best in warmer climate, most lilac species require hardiness zone 3-7 climates; look here to identify your zone. You can find a full page on lilacs that grow well in warmer climates on the USDA Hardiness Zone Map.

  • Well-drained alkaline soils are great for growing lilacs.
  • Even though some shade can’t hurt them, lilacs perform better when grown in direct sunlight.
  • Powdery mildew is a common issue for lilacs; you can reduce the likelihood of occurrence by providing sufficient space for the circulation of air when planting them.
  • It may take up to 3 years for new shoots to start forming flower buds.
  • To encourage the formation of new buds the following year, remove spent blossoms with a pair of sharp clippers or deadhead them.

Deadheading lilacs is essential for the first three or four years, after maturity it becomes less important. To form new flower buds, a mature plant, in addition to being too high, the plant won’t need deadheading to encourage the formation of new buds. However, without using a ladder, I always remove as many old blossoms as I can get to.

Lilac branch on a table

Lilac Pruning Requirements

As a rule of thumb, you should only start pruning, and shaping, your lilac plant when the main stem’s diameter is 2” and the height is anywhere between six and eight feet.

After the spring flowering season is over, it is time to start pruning the plant. Newly formed buds will have all summer to develop when you prune early. You might end up pruning away the buds for next spring if you do it too late. 

Prune away around one third of the plant’s stems to keep it looking fresh. Branches that grow across each other, diseased and dead stems, twiggy growth and pencil thin sucker should be removed.

To allow the growth of new shoots and the circulation of air around the shrub, remove large stems from the center of the plant. 

Even though the choice to allow the plants to grow tall or to a manageable height is all up to you, when left to their own devices, the plants can grow to a height of more than 15 feet.

lilac shrub

Some Interesting Facts About Lilacs

You can eat lilacs! A simple, tasty and attractive lilac flower garnish prepared by a “Canadian Foodie”.

Categorized under the Oleaceae (olive) family, the lilac is a lowering plant whose botanical name is Syringa vulgaris.

The term syrinx or syringa roughly translates to “hollow tube” in Greek. Ages ago, flutes and reeds pipes were fashioned from the shoots of lilac plants.

The term Vulgaris on the other hand roughly translates to well-known or common. Just to show how common lilacs are, there are more than twenty known species of the plant, with over 2000 documented cultivars.

Brought to North America back in the seventeenth century, the popular S vulgaris lilac originated from the rocky hills of the Balkan Peninsula.

Canadians, myself included, are encouraged each year to start planting when we see and smell the sweet flowering lilac blooms. I guess the main reason is that the May long weekend is considered as our time to prepare our gardens; and these flowers typically bloom in May.

Learn About Indoor Gardening in Canada

house plant on the windowsill

Indoor Gardening in Colder Climates

Outdoor gardening is sometimes not an option given the cold climate. If so, considering using the indoors to grow your favourite plants. Once you enjoy a salad made from fragrant herbs and leafy greens you grow at home, you’re never going to look back from indoor gardening.

The Ideal Location for An Indoor Garden

Picking a good location for your indoor garden is crucial. Windowsills are good if they have fairly constant temperatures, but seedlings grow stronger roots in soil that is consistently warm. Pick a place that’s away from the household traffic, drafts, and pets. The average room temperature also shouldn’t be much cooler than 15 or 16C, roughly 60F.

A cabinet that can accommodate lighting while giving you day and night temperature controls is ideal for doing an indoor garden.

Light Requirements

The following are a few facts that are good to know about plants as well as how they use light:

Wavelengths: Red and blue wavelengths prove the most useful for plants in terms of photosynthesis (more regarding photosynthesis). Plants reflect green wavelengths instead of using it, and that’s why they look green to human eyes (surely after all these years you remember that from your science classes).

Light Quality: Electric light just doesn’t have the same colour mixture that sunlight does. Cool and white fluorescent lights have too much blue and not enough red for very efficient photosynthesis. If you do use such lights, add some incandescent lights which are higher in the red wavelengths. Specially designed tubes that are high in both blue and red are on the market and used widely in greenhouses.

plant in the window

Light Intensity

Lights need to be 2 up to 4 inches above the tops of seedlings. Plants need from 12 up to 16 hours of total light each day. If they don’t get enough light, then seedlings are going to develop long and thin stems while they reach up for the light. Auto-timers can offer the routine of darkness and light which plants need.

Light Duration

The length of day is very crucial to whether plants flower or not. Because of this, plants typically get categorized as being day-neutral, long-day, or short-day. Generally speaking, long-day plants should flower when they get 12 hours of sunlight or more, short-day plants flower under 12 hours of light, and the day-neutral plants will flower at maturity.

Short-Day Plants

Popular short-day plants that flower with exposure to less than 12 daily hours of light include begonia, azaleas, kalanchoe, poinsettia, and chrysanthemums.

Long-Day Plants

Long-day plants that flower with more than 12 daily hours of light include bromegrass, rye-grass, fuchsia, sugar beet, dill, and spinach. If they don’t get enough sunlight, they might wind up long and lanky.

Day-Neutral Plants

Day-neutral plants that flower at maturity include African violet, coleus, geraniums, and foliage plants. These do well in any amount of available sunlight, and they include most fruit trees and tropical plants. Other day-neutral options that flower at maturity include dandelions, cucumber, corn, tomato, and some strawberries.

Learn About Pruning Shrubs and Trees

garden path with trees and shrubs

The Best Times to Prune Shrubs and Trees in Your Yard

Flourishing Plants Ironically Means Cutting Things Back

When your shrubs and stress start looking scraggly, then it’s time to get them a haircut. Pruning means that healthy branches have a chance to grow. The roots of the plant can offer more nourishment, given how there is less plant to feed. Pruning also means that a shrub or tree can focus on its flowering or production of nuts or fruit, rather than just growing leaves. Also, a bit of pruning can get rid of the unhealthy branches of a plant, which are potential entry points for diseases. Follow these simple steps to learn more about pruning shrubs and trees on your own.

Prune During Dormant Phases

In the very early stages of spring, or even before then in winter, your trees are going to be dormant and new buds have yet to form. This is when you should get your pruners out. In the wintertime, when there are no blossoms or leaves in the way, then you can get a much better sense of the shape of a plant. In springtime, after leaves have already sprouted, it’s possible to remove the sucker growth you might see around the plant base. However, don’t prune any other parts of the shrub or tree, since the new leaves are just too young to replenish any energy pruning winds up creating a need for. If your shrub blooms in the spring season, then prune it after its blooms have totally faded. If the shrub blooms during the summer, then do the pruning in either late winter or the early parts of spring.

Watch Your Weather

The best time to prune is a dry or mild day so your newly pruned plant isn’t shocked by wet and cold conditions.

Thin Out the Branches

The general idea here is removing growth which looks ill-formed, weak, overcrowded, or crossed. The healthy branches will get healthier as they won’t have to compete as much for nutrients and room. Thinning out the branches will allow more of the shrub or tree to absorb the rays of the sun and also manage its shape. You can also prevent a plant from physically outgrowing its landscape space as it invades the turf of other plants.

Where You Should Cut

Prune shrubs and tress back to another branch or to the main stem. You’re also free to prune back any buds facing outward. Be sure that your pruners are sharp and make your cuts with the blade starting out just as close to the branch as you can; in short, don’t hack at your plant. If sizing down is your intention behind pruning, make sure that you give the plant a shape that looks more natural by pruning the branches to a variety of lengths.

Follow the Plant’s Lead

Watch how your shrubs and tress do during the growing season after pruning. The ways they grow, or even don’t grow, can help you get guidance for your next pruning session. Always follow the natural ways the plant seems to want to grow.

The Canadian Garden – Fruit Trees

flowering branches on a tree

Fruit Trees, Your Next Landscape Addition

Learn how you can plant a fruit tree in Canada by using these step-by-step directions to make a fruit tree your next landscape addition.

Pick A Fruit Tree

Apples and cherries are both trees that thrive in the cold of northern latitudes. Citrus trees usually prefer climates that are warmer. Depending on what region you’re in, any kind of fruit tree you can plant successfully won’t just beautify your landscape but also offer you tasty snacks off the tree. You can pick a fruit tree which thrives even in your Canadian climate. If you aren’t sure which fruit trees will grow in your local area, then ask around at your community garden center.

Pick A Location

Fruit trees adore the sun, so you should pick a location that offers 6 to 8 hours of sunlight. You’ll also need soil that’s rich in nutrients as well as retains moisture. Also, be sure you have plenty of space for the tree to grow.

Plant the Tree

Your tree is going to have an easier time getting itself established if you decide to plant in the spring season. Dig a hole that’s twice as wide as the tree’s container but not as deep. Gently tease any roots that are on the edge of your root ball before placing that root ball into the center of your hole. Your graft line is the spot where the tree got grafted onto the root stock; be sure that this line is above the soil. If you’re not sure, ask the garden center staff to show you where the graft line is. Fill the space in with a 50/50 mix of compost and native soil. Miracle-Gro Garden Soil is a good choice for compost. Tamp the soil down lightly to get rid of any air pockets. Use a bit of the extra soil to form a well around the base of the tree which can help funnel water to its roots before soaking it thoroughly with water.

cherries on a branch

What Is at Stake?

Young trees have to have support, so make sure your new tree gets staked. Use a trio of stakes set around in a triangle about a meter or two (4 to 6 feet) from the tree’s base. Run some wire from every stake around the trunk around 1 to 1.5 meters (3 to 4 feet) off the ground before going back to the stake, being sure that each wire has equal tension. Wrap the wire with parts of garden hose when it contacts the actual trunk so that you can avoid chafing image. Avoid staking your tree overly tight. You’ll need to leave it room to sway a bit.

Feed, Mulch, And Water

Add an 8 centimeter or 3-inch layer of mulch all around the base so your tree can retain moisture better. Just make sure you keep that mulch away from the tree’s graft line. Give the tree a deep watering, wetting soil as much as 60 centimeters or 2 feet deep weekly until you know it’s established. Also, feed the tree with Miracle-Gro Tree and Shrub Fertilizer Spikes in both early spring and the middle of the fall.

Care for Your Fruit Tree

If you want to structure the tree and set its growth patterns, you might want to prune the fruit tree the first four or five late winters. In the later years, you’ll get more fruit production if you prune it. Feed the fruit tree every year, especially in summer and spring. Put a small fence around your trunk to protect it from deer and mice.